Green Production starts with Green Products
2022年11月4日“Bamboo Swing” in Moganshan Fuxi River Bridge Competition
2023年4月10日How to Create your Own Battery
Did you know ?
You can Create your Own Battery !
Here is the recipe for a 7 Volts Salt Water battery. Check it out!
Estimated time: 5 Min
1 Step 1 Minute
It is actually pretty easy to build a salt water battery and it is the most sustainable solution
for your energy consumption.
In this article we will show you how to do it in 5 Steps:
STEP 1. Prepare the items
• 9x small food jars
• 9x galvanized nails (7,62–10,16 cm long)
• 9x copper wires #12 (you can cut the wire into equally long 45,72 cm)
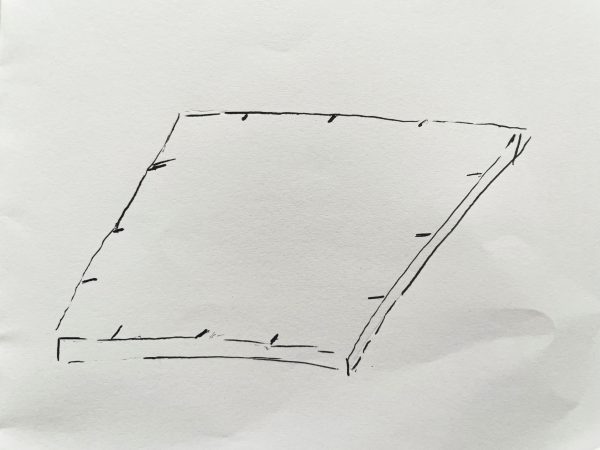
• A piece of plywood 20,32 cm x 20,32 cm
• Water
• Sodium table salt
• 15V LED bulb
• Your solar panel or a solar battery charger
• Pencil
• Rule squad
• Power drill
• Wood rod
• Multimeter
STEP 2. Setting-up
1. Draw layout lines
- Create layout lines by placing the jars on top of the wood. With a pencil, mark the center lines
on the sides, in each direction. Then, use your ruler to extend de center lines (to know where to
put the wires).
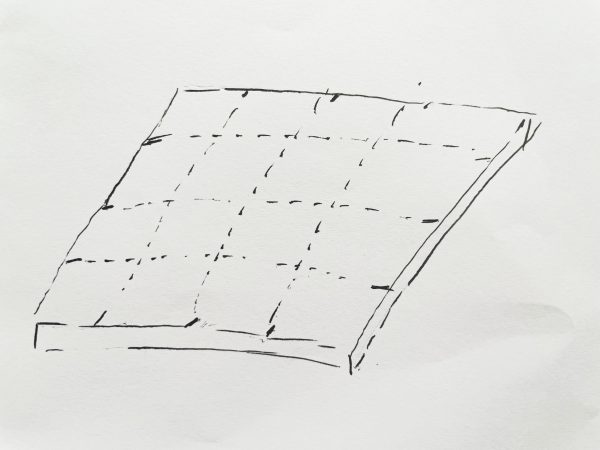
- With your pen, add two marks on each side of each center, for the “cathode” and “anode“
wires position. You can take your rule squad and extend those line to make sure all of them line
up (to look even). You will have a total of 18 marks when you are done.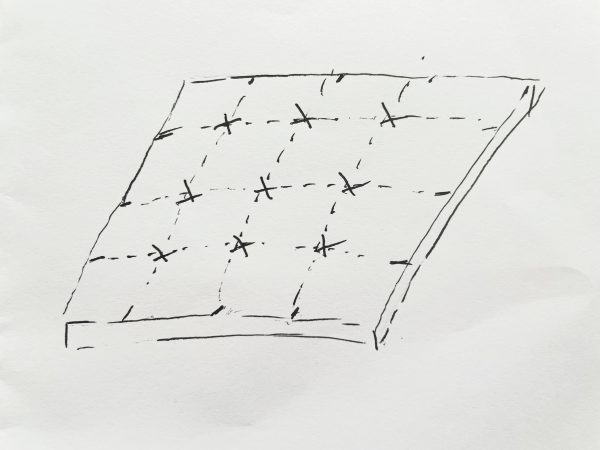
- Mark the positive and negative connections as the following
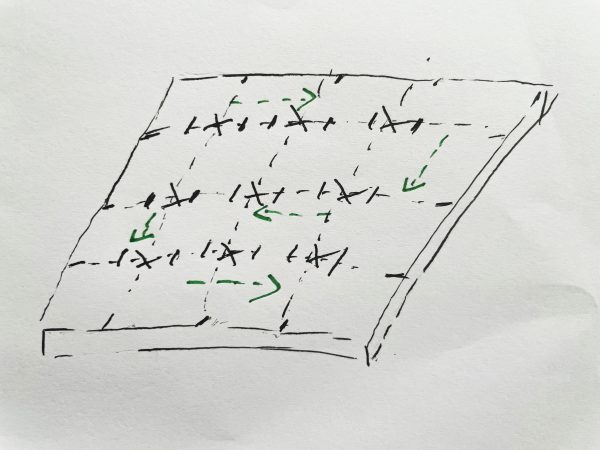
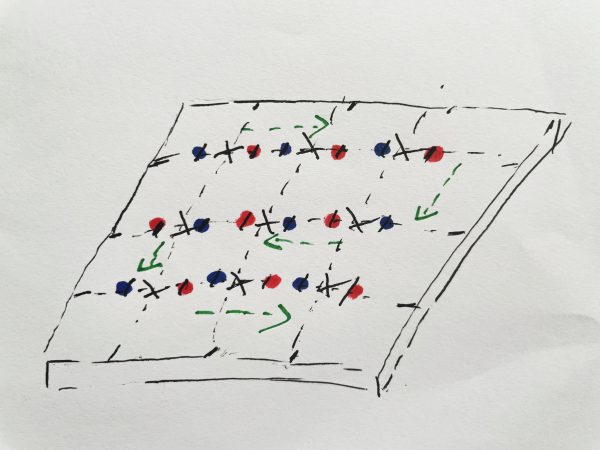
Red: Positive
2. Prepare the wires
- Make coils from the copper wires by curling them around a small cylinder like the wood rod.
Just leave the half without curling to use for the connection of the battery cells.
STEP 3. Drilling & Connecting
Because the hole sizes are different between the positive et negative. Drill all the positive in one
time and then all the negative in one time.
Use the galvanized nails size for the negative and copper wires size for the positive.
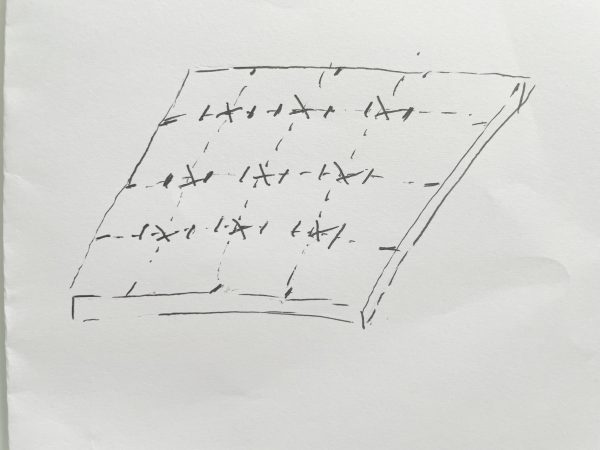
STEP 4. Assembling
- Insert the galvanized nails (consider the high that you need, you can check that it fits into a jar
with enough space).
- Insert your copper wires and insert in the positions next to the nails. (Try to get the high about
the same as the galvanized nails)
- Bend the copper wires around the nail of the next cell. Each cell should be connected from the
cathode (copper wire) of a cell to the anode (nail) of the next one. At the end, you will have
one free anode and cathode at each corner, being the positive–negative terminals of your
DIY rechargeable saltwater battery.
STEP 5. Add Saltwater & Test It!
- Take 4 cups of water and 16 spoons of salt and fil the baby foos jars.
- Connect your solar panel or a solar battery charger, and see how the nails start to bubble as
the battery cells charge. When time passes, the cells will turn green because of the copper
wire.
- Power your light bulb!
Your battery is ready!!!!!